Short answer: with the generator stopped, turn the SX460’s VOLTS pot fully counterclockwise, set the STAB pot and any remote hand trimmer to the middle, connect a 0–300 V AC voltmeter between one phase and neutral, start the set with no load, bring the speed to 50–53 Hz (or 60–63 Hz), then turn VOLTS slowly clockwise until the meter shows the rated voltage on the nameplate. If the voltage hunts, set STAB and then touch up VOLTS. Leave the sealed UFRO pot alone unless the red LED is lit at normal speed.
That is the order Stamford gives in the official SX460 manual (A043Y696) and the original SX460 datasheet. The rest of this guide explains each control, the full procedure, and how to tell when STAB or UFRO is set wrong.
- VOLTS: sets output voltage. Clockwise raises it.
- STAB (stability): damping. Clockwise adds damping and calms hunting.
- UFRO (under-frequency roll-off): sets the speed “knee” below which the AVR lowers voltage. Clockwise lowers the knee frequency. Factory set and semi-sealed.
- Hand trimmer (optional): a remote 1 kΩ, 1 W pot across terminals 1 and 2, giving roughly ±10% around the VOLTS setting.
Safety first
The SX460 is powered straight from the alternator output, so its terminals, its trimmer leads and its heatsink are live whenever the engine turns. Stamford’s manual says the AVR should be set up only by trained service engineers. In practice that means:
- Isolate the set and use lockout/tagout before removing the AVR cover or touching any wiring.
- Make adjustments with an insulated trimming screwdriver, one hand, and the rest of you clear of the terminal box.
- Never go above the voltage on the alternator rating plate.
- Never ground any hand-trimmer terminal. Stamford warns they can sit above earth potential, and grounding them can damage the equipment.
If you are not trained to work around live generator terminals, have a generator technician do this. Overvoltage from a careless turn of VOLTS goes straight into whatever is plugged in.
What you need
- A small insulated flat-blade trimming screwdriver (the pots are tiny slotted trimmers).
- An AC voltmeter with a 0–300 V range, rated CAT III or better for generator work.
- A way to read frequency: the set’s control panel, a meter with a Hz function, or a frequency meter.
- The alternator rating plate data: rated voltage, frequency and connection.
- Access to the engine speed (governor) adjustment, because the AVR can only regulate correctly at the right speed.
Find the controls on your board
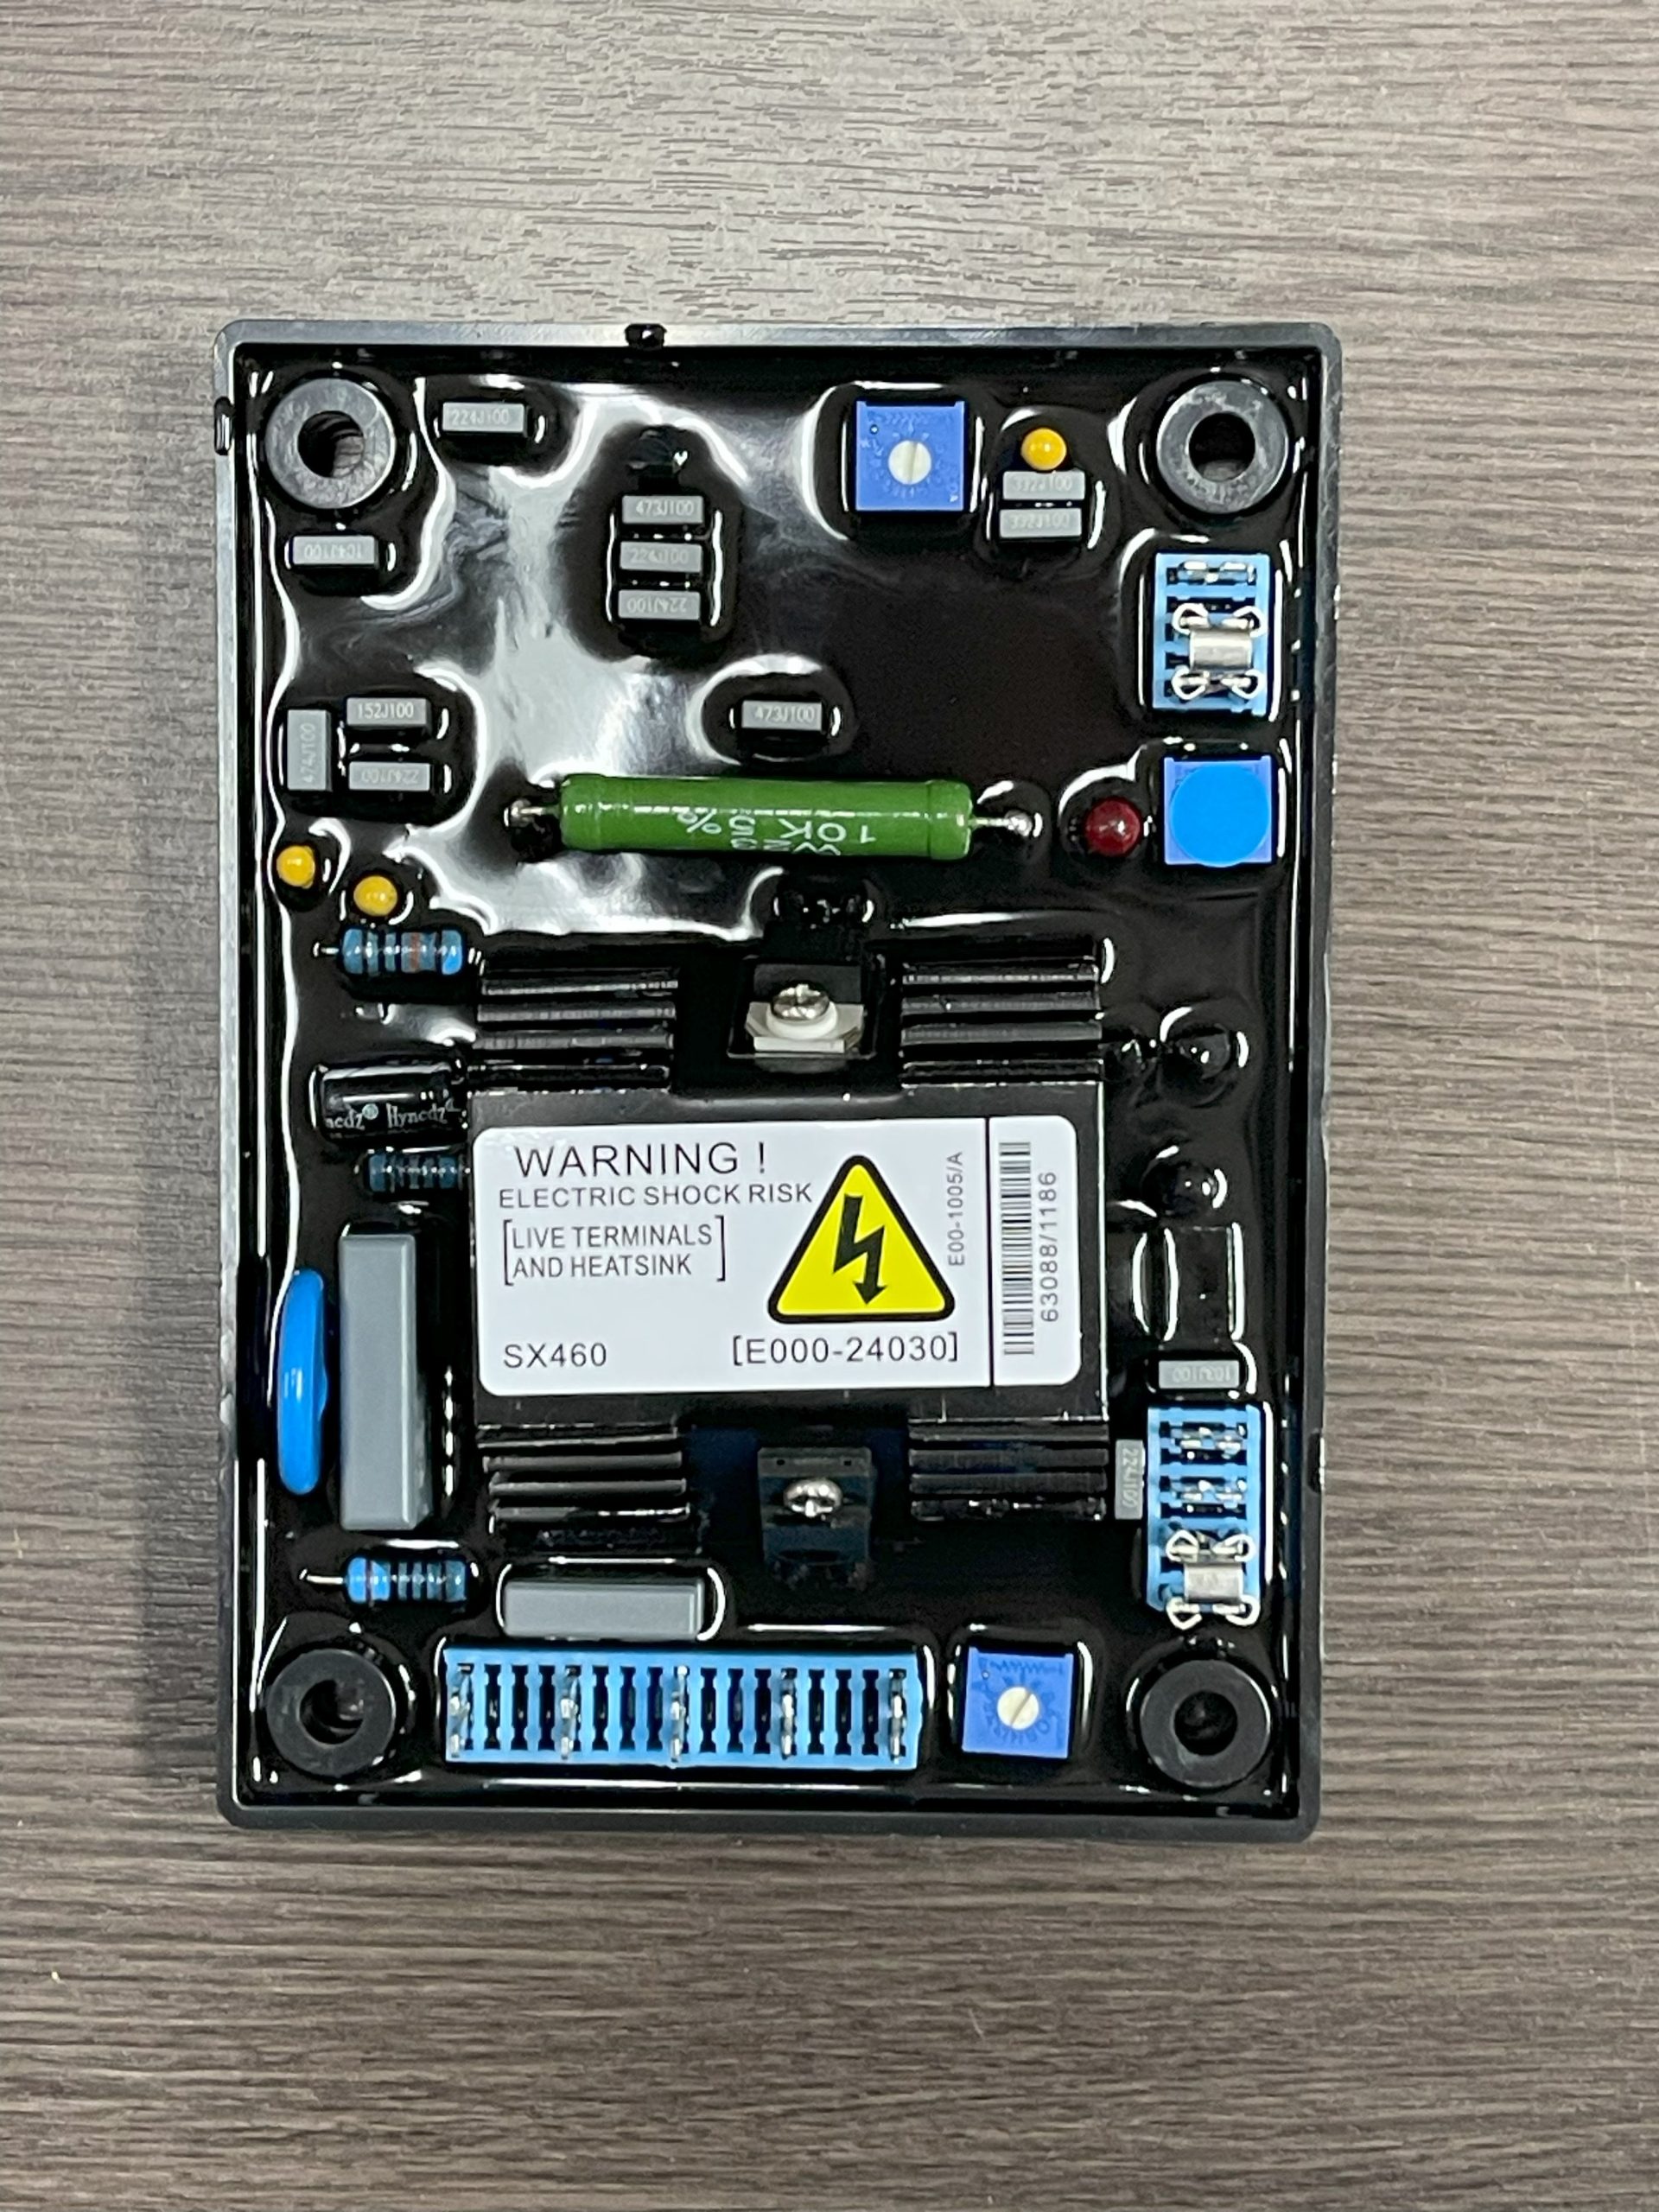
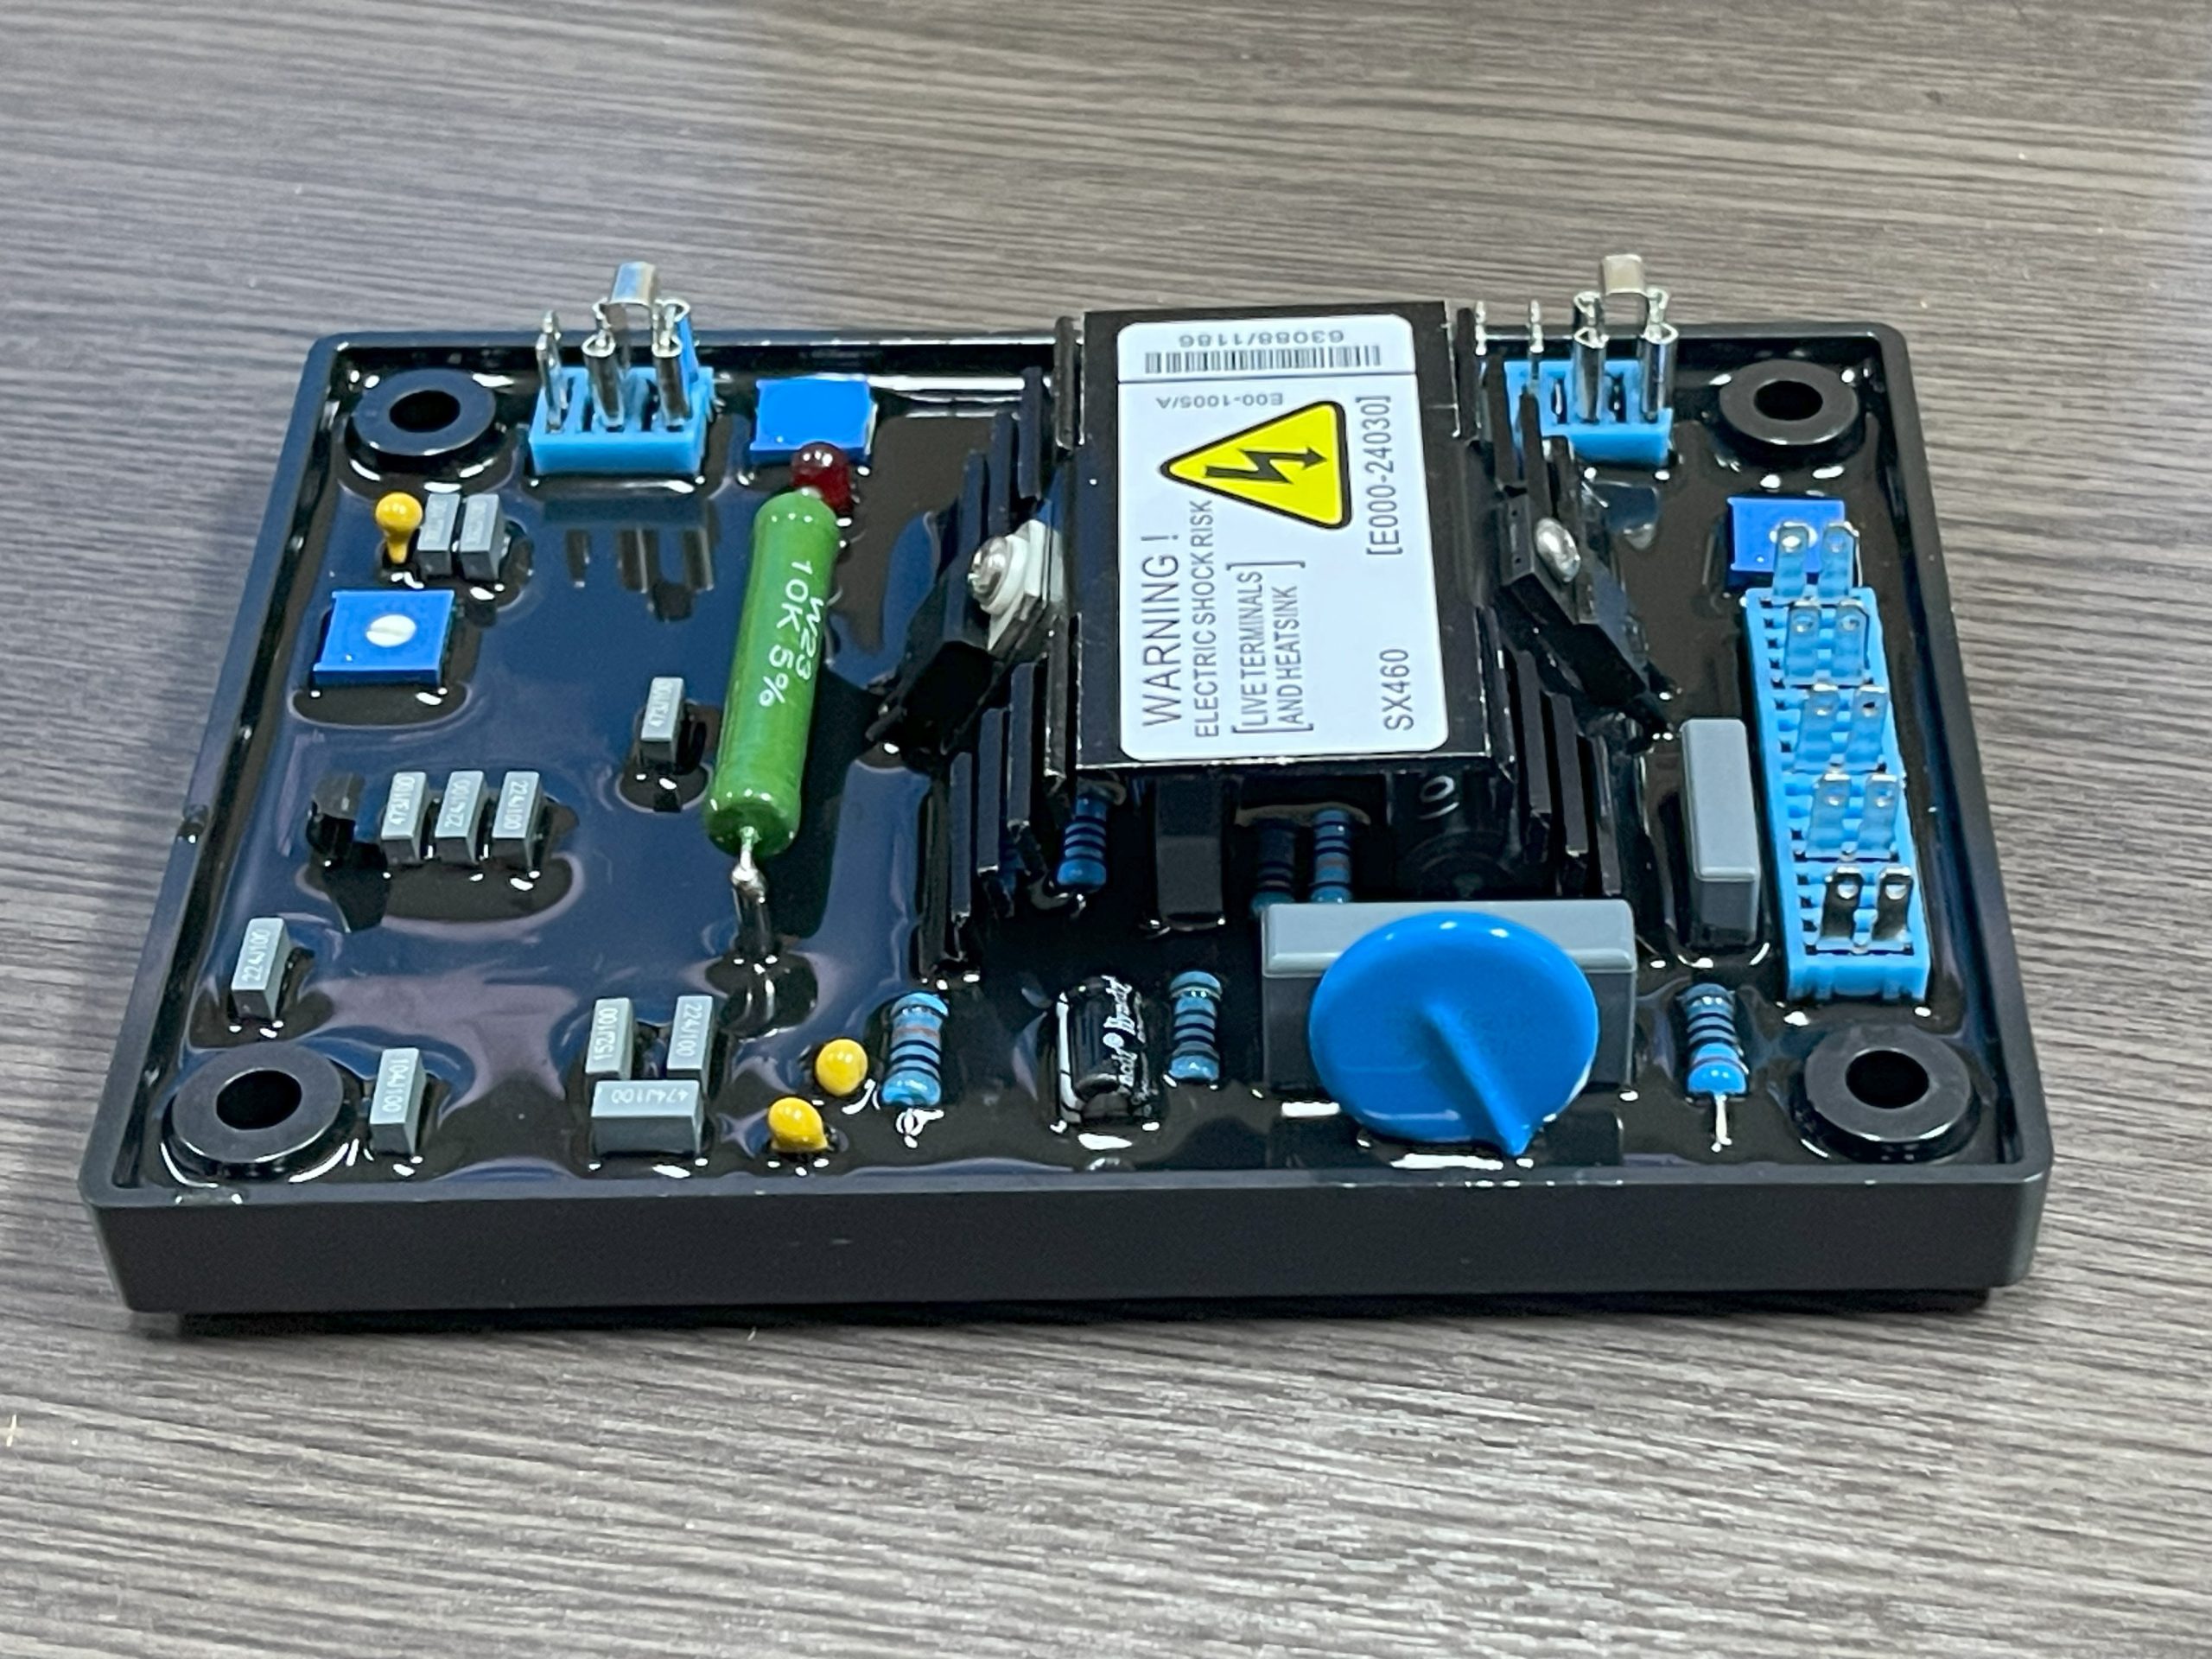
The SX460 has three adjustment pots, three link positions and one LED. On the board in our photos you can see two open, slotted trimmers and a third pot covered by a solid cap right next to the red LED, which fits the manual’s note that UFRO is preset and sealed. The printed labels are not legible in our photos, and replacement boards from different makers don’t always lay things out identically, so read the label printed beside each pot on your own unit before turning anything.
| Control or link | What it does | Direction / setting |
|---|---|---|
| VOLTS | Sets generator output voltage | Clockwise increases voltage |
| STAB | Damping, stops voltage hunting | Clockwise increases damping |
| UFRO | Sets the under-frequency knee point | Clockwise lowers the knee frequency |
| Link 1–2 | Hand trimmer selection | Link fitted = no trimmer; link removed = trimmer wired across 1 and 2 |
| Link 3–4 | AVR supply/sensing range | Fitted = 110/120 V input; no link = 220/240 V input |
| Frequency link (C–50 / C–60) | Tells the UFRO circuit the rated frequency | C–50 for 50 Hz, C–60 for 60 Hz |
| Red LED | Lights when UFRO is reducing voltage | Should be off at normal speed |
Check the three links before you start. A wrong 3–4 link or frequency link will make every pot adjustment look wrong. Our SX460 wiring and connection guide covers the links and terminals in detail.
Step-by-step: setting the voltage
This follows Stamford’s “initial AVR setup” and VOLTS procedures. Use it after fitting a replacement AVR or whenever the voltage needs resetting.
- Stop and isolate the generator set. Remove the AVR cover.
- Turn VOLTS fully counterclockwise (minimum). This guarantees the first start can’t overshoot.
- Check terminals 1 and 2. Either the shorting link is fitted or a hand trimmer is connected. If a trimmer is fitted, set it to its midpoint.
- Set STAB to the midway position.
- Connect the voltmeter (0–300 V AC range) between one output phase and neutral.
- Start the set with no load and adjust engine speed to nominal frequency: 50–53 Hz for a 50 Hz machine, 60–63 Hz for a 60 Hz machine.
- Look at the red LED. If it is lit at this speed, the UFRO circuit is pulling the voltage down. Recheck the frequency link and the speed first; only then go to the UFRO section below.
- Turn VOLTS slowly clockwise until the meter reads the rated voltage. Small movements: the full travel spans a wide voltage range.
- Watch for instability. If the voltage swings or flickers at rated voltage, set STAB (next section), then come back and re-trim VOLTS.
- Check the hand trimmer if fitted. Per Stamford, its full rotation covers about 90% to 110% of the set voltage.
- Stop the set, refit the cover, then confirm the voltage again under a normal load.
One practical note: the AVR only regulates the voltage it senses, which is a single-phase sample from the main stator. If your phases read differently, check which lines feed the AVR on the alternator wiring diagram, and treat a large unbalance as a separate fault.
How to set STAB (stability)
STAB adds negative feedback so the voltage settles quickly after a load change without overshooting or oscillating. The goal is the “critically damped” point: just enough damping to be stable, no more.
- Run the set at rated speed with no load and the voltage within safe limits.
- Start from a damped position. The current manual says about 75% (three-quarters clockwise); if the voltage is already hunting, go straight to the next step.
- Turn STAB slowly counterclockwise until the voltage starts to become unstable.
- Turn it slowly clockwise until the voltage is stable again.
- Go a further 5% or so clockwise. That is your setting.
- Recheck and re-trim VOLTS if it moved.
Unlike the larger SX440, the SX460 has no stability-selection link for machine size, so the pot is the only adjustment. Some replacement-board leaflets, including the one packed with the unit in our photos, tell you to start with stability fully clockwise. That is still compatible with the method above: you are looking for the edge of instability and then backing off slightly to the stable side.
UFRO: when (and when not) to touch it
UFRO protects the exciter and AVR when the engine runs slow. Below the knee point, the AVR reduces voltage roughly in proportion to speed, and the red LED lights. The datasheet puts the knee at about 95% of rated frequency, with the slope continuing down to 30 Hz. Stamford’s datasheet says the UFRO pot is preset and sealed and normally only needs the 50/60 Hz link set correctly.
If the LED stays lit at correct speed and the frequency link is right, Stamford’s procedure is:
- Set UFRO fully clockwise.
- Run at correct speed and confirm the voltage is correct and stable (fix VOLTS or STAB first if not).
- Reduce speed to about 95% of nominal: 47.5 Hz on a 50 Hz set, 57 Hz on a 60 Hz set.
- Turn UFRO slowly counterclockwise until the LED lights.
- Turn it slowly clockwise until the LED is just off. Don’t go past that point.
- Return to 100% speed. The LED should be off.
Symptoms of wrong STAB or UFRO settings
| Symptom | Likely setting problem | What to do |
|---|---|---|
| Voltage swings rhythmically at no load; lights pulse | STAB too far counterclockwise (under-damped) | Redo the STAB procedure. Also confirm the engine speed itself is steady. |
| Voltage is steady but slow to recover after a load is switched on, with deeper dips | STAB further clockwise than needed (over-damped) | Back STAB off toward the edge of instability, then 5% clockwise. |
| Red LED lit at normal speed; voltage low | Engine speed low, C–60 link fitted on a 50 Hz machine, or UFRO knee set too high | Check speed and the C–50/C–60 link, then the UFRO procedure. |
| LED permanently lit on load; poor regulation on load | UFRO knee too high, or engine drooping below the knee under load | Stamford lists exactly these two symptoms for an incorrect UFRO. Check governor droop first. |
| Voltage stays near nominal even when the engine is clearly running slow (warm-up, overload) | UFRO knee set too low, or 50 Hz link fitted on a 60 Hz machine | Correct the link; reset UFRO so the LED lights just below 95% speed. |
| VOLTS has no effect at the low end; output stuck low | Link 1–2 missing or trimmer lead open, or link 3–4 fitted on a 240 V machine | Check continuity of link 1–2 / trimmer and the 3–4 link. |
A note on the frequency link: the knee is about 95% of whichever frequency is selected. A 60 Hz machine with the link on C–50 would get a knee near 47.5 Hz, so it loses most of its low-speed protection. A 50 Hz machine on C–60 would see its knee near 57 Hz, so the LED would be on and the voltage pulled down at normal speed.
Frequently asked questions
Which way do I turn the SX460 VOLTS pot to increase voltage?
Clockwise increases output voltage; counterclockwise lowers it. Before a first start or after fitting a new AVR, Stamford says to start with VOLTS fully counterclockwise and bring it up slowly.
How much can the external hand trimmer change the voltage?
Stamford rates the SX460 external adjustment at ±10% with a 1 kΩ, 1 W trimmer, applying to Mod status F boards onward, and notes a generator de-rate may apply. The leaflet with the replacement board in our photos lists ±7% instead, so check the documentation for your specific board.
Why does my generator voltage drop when I add load, even after adjustment?
The most common cause is engine speed sagging under load, which drags the frequency below the UFRO knee. Watch the red LED while loading the set: if it lights, fix the governor before touching the AVR. Stamford’s fault table also lists checking UFRO and running the separate excitation test. See how to test an automatic voltage regulator on a generator.
Why is the voltage too high even with VOLTS turned down?
Stamford’s fault table points to two causes: overspeed, and a capacitive (leading power factor) load. Also check that the 3–4 link isn’t missing on a 110/120 V machine, which puts the AVR on its 220/240 V range and makes it aim far too high.
Is the SX460 still made?
Stamford lists the SX460 as obsolete and superseded by the AS440. Many replacement boards marked SX460 are still sold; their specs can differ slightly from the original, as our SX460 AVR overview discusses.
Quick checklist
- Set is isolated; links 1–2, 3–4 and C–50/C–60 match the machine.
- VOLTS fully counterclockwise, STAB and trimmer midway before first start.
- Speed at 50–53 Hz or 60–63 Hz, no load, LED off.
- VOLTS clockwise to rated voltage, never above the rating plate.
- STAB: find the edge of instability, then about 5% clockwise. Re-trim VOLTS.
- UFRO only if the LED is lit at correct speed with the right link.
If the voltage won’t build at all, or won’t respond to VOLTS, stop adjusting and test the AVR and the alternator instead. Repeated adjustment of a faulty board, or of a good board on a machine with a failed rotating diode, just wastes time.