Short answer: when a Raspberry Pi 3 B+ shows nothing on the screen, the two LEDs beside the power socket usually tell you why. If the red PWR LED is off or flickering, the power supply isn’t delivering enough. If the red LED is steady but the green ACT LED never flickers, the Pi isn’t reading a bootable microSD card, so reflash it. If the green LED flickers normally and the screen still says “no signal,” the Pi is booting and the problem is the HDMI link. The most common cause is that the monitor wasn’t detected at power-on.
- Turn the monitor on and select the right HDMI input before plugging in the Pi’s power.
- Use a 5.1 V micro USB supply rated for 2.5 A, which is what Raspberry Pi recommends for the Pi 3.
- Reflash the card with Raspberry Pi Imager, choosing “Raspberry Pi 3” as the device.
- On current Raspberry Pi OS (Bookworm, Trixie), old tricks like hdmi_force_hotplug and hdmi_safe no longer apply. Force the output with a video= setting in cmdline.txt instead (details below).
- Can’t get a picture at all? Set up SSH in Imager and run the Pi headless.
Step 1: Read the LEDs
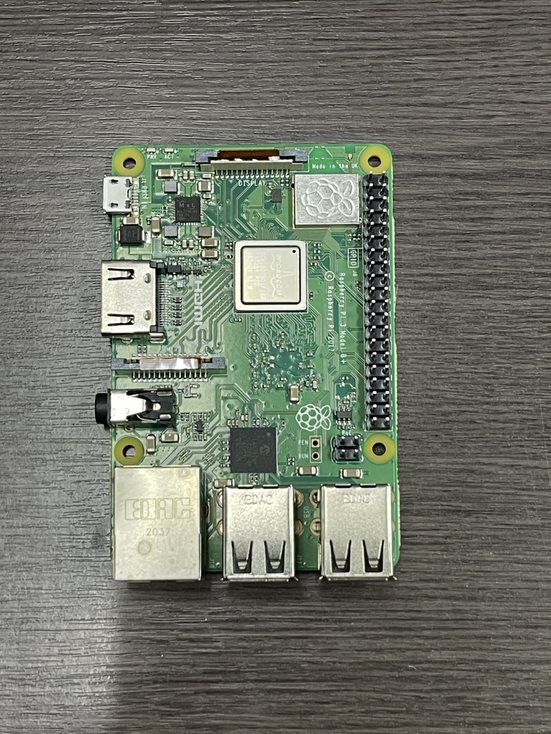
The Pi 3 B+ has two status LEDs in the corner next to the micro USB power input, labeled PWR (red) and ACT (green) on the board. According to the official LED documentation, the red LED shows a stable 5 V supply and goes off or flickers when there’s undervoltage. The green LED flashes when the microSD card is being accessed.
| What you see | Likely cause | Fix |
|---|---|---|
| No LEDs at all | No power reaching the board: dead supply, charge-only or broken cable, faulty outlet | Try a known-good 5.1 V 2.5 A supply and a different cable |
| Red off or flickering, green may blink | Undervoltage | Better supply and a shorter, thicker cable; unplug USB drives and other power-hungry devices |
| Red steady, green never flickers | No card, or a card with no readable boot files | Reseat the card; reflash it with Imager; try another card |
| Green flashes in a repeating pattern | Boot error (see the flash code table below) | Match the pattern, then reflash or replace the card |
| Red steady, green flickers irregularly, screen blank | Pi is booting; HDMI not detected or wrong video mode | Follow Steps 4 and 5 |
Green ACT LED flash codes that apply to a Pi 3 B+
When the Pi can’t boot, the ACT LED blinks a code: long flashes first, then short ones, repeating after a pause. Raspberry Pi’s documentation lists these codes. The ones relevant to a Pi 3 are below; others in the official table apply only to the Pi 4 and Pi 5.
| Long flashes | Short flashes | Meaning | What to do |
|---|---|---|---|
| 0 | 3 | Generic failure to boot | Reflash the card; try another card |
| 0 | 4 | start*.elf not found | Boot files missing or corrupted; reflash |
| 0 | 7 | Kernel image not found | Image incomplete or for the wrong board; reflash with “Raspberry Pi 3” selected |
| 0 | 8 | SDRAM failure | Possible hardware fault; check power first |
| 2 | 1 | Partition not FAT | The card wasn’t written as a Pi image; reflash with Imager, not a file copy |
| 2 | 2 | Failed to read from partition | Worn or fake card; replace it |
Step 2: Rule out the power supply
Raspberry Pi says all models need a 5.1 V supply and recommends its 2.5 A micro USB supply for the Pi 3 family (power supply docs). The docs also warn that the supply voltage must stay above 4.8 V, and that some USB chargers sag as low as 4.2 V because they’re designed to charge batteries, not run a computer. Long, thin micro USB cables make this worse.
If the Pi boots far enough that you can log in (over SSH, for example), run vcgencmd get_throttled. A result of throttled=0x0 means no problems. Any other value includes a flag: bit 0x1 means undervoltage right now and 0x10000 means undervoltage has happened since boot. A result like 0x50005 means the Pi is undervolted and throttling now, and has been since boot.
Step 3: Reflash the microSD card properly
- Install Raspberry Pi Imager on another computer.
- Device: Raspberry Pi 3. OS: Raspberry Pi OS (64-bit) or Lite. Storage: your card.
- In the Customisation tabs, set a username and password, your Wi-Fi network and Enable SSH. This is your backup plan if the screen still stays dark.
- Write and let Imager verify the card. Then, with the Pi unplugged, insert the card into the slot on the underside of the board.
- Connect HDMI, switch the monitor on, then connect power. Give the first boot a few minutes. Raspberry Pi’s setup guide says to check the status LED if the Pi hasn’t booted within five minutes.
Copying an .img file onto the card like a normal file doesn’t work. Also watch out for board-specific images: Raspberry Pi OS runs on every model, but systems like LibreELEC and Home Assistant OS have a separate image for each Pi, and a Pi 4 or Pi 5 build won’t boot a Pi 3. If two different good cards fail the same way, look harder at power and the board itself.
Step 4: Fix the HDMI handshake
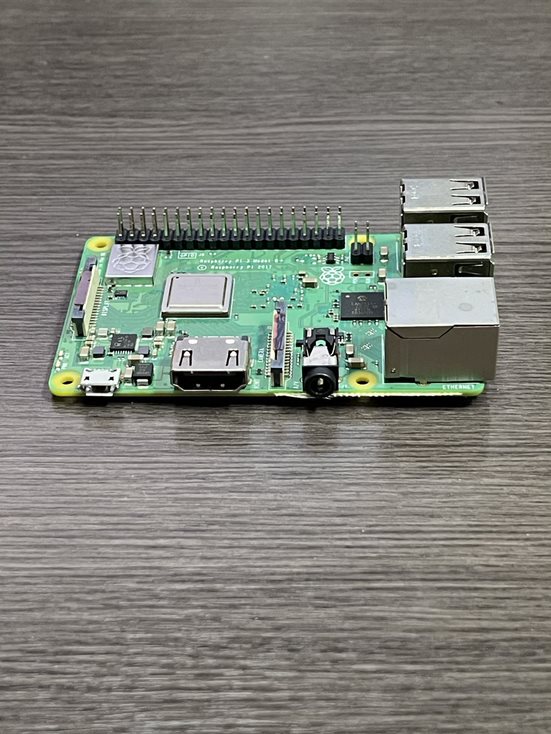
A Pi that boots with a black screen is usually a detection problem. The Pi reads the display’s identity data (EDID) over HDMI at startup to pick a resolution. The official config.txt video documentation states plainly that HDMI output is disabled when no HDMI display is detected. If the monitor is off, set to another input, or behind an AV receiver or HDMI switch that doesn’t pass EDID through, the Pi can conclude nothing is connected and never turn HDMI on. Models like the Pi 3 also have composite video on the AV jack, so older setups in particular could switch their output there.
- Power the monitor first and select its input, then power the Pi.
- Plug the Pi directly into the monitor, skipping switches, extenders and receivers.
- Swap the HDMI cable. With HDMI-to-VGA or HDMI-to-DVI adapters, cheap converters often report no EDID or a broken one.
- Try a TV if your monitor is picky, or the other way around.
Step 5: Force HDMI on current Raspberry Pi OS (KMS)
This is where most online advice is out of date. Tutorials tell you to add hdmi_force_hotplug=1, hdmi_safe=1, hdmi_group and hdmi_mode to config.txt. Raspberry Pi now files those under legacy options and states that they don’t work with Raspberry Pi OS Bookworm and later. Current releases use the Linux KMS graphics driver, which handles the HDMI output itself.
On a current image, set the mode on the kernel command line instead:
- Put the card in another computer and open the boot partition (it appears as bootfs).
- Open cmdline.txt. It’s a single line. Add a space at the end, then append: video=HDMI-A-1:1920x1080M@60D
- Keep everything on that one line, save, and boot the Pi.
Here HDMI-A-1 is the Pi 3’s only HDMI port and 1920x1080M@60 is the resolution and refresh rate (the official display settings page explains the format). The trailing D is the standard Linux kernel flag (see the kernel’s modedb documentation) for forcing a digital output on even when no display is detected. That makes it the closest replacement for hdmi_force_hotplug. If your screen can’t do 1080p, use a lower mode such as 1280x720M@60D.
A second documented option helps if the Pi picks a mode your display can’t show: add disable_fw_kms_setup=1 to config.txt (on current images it’s at /boot/firmware/config.txt). The firmware then stops passing its chosen mode to the kernel, and KMS reads the EDID itself.
If you’re deliberately running an old pre-Bookworm image that uses the legacy firmware display driver, the old hdmi_safe=1 trick can still apply there. On a fresh install, the video= setting above is the one to use.
Step 6: Skip the monitor entirely (headless fallback)
If you only need the Pi to run a service, you may not need a screen at all. With SSH and Wi-Fi set in Imager’s Customisation tabs (or an Ethernet cable plugged in), boot the Pi, wait a couple of minutes, then from another computer run ssh yourusername@yourhostname.local. If .local names don’t resolve on your network, find the Pi’s IP address in your router’s list of connected devices and use that. Once you’re in, vcgencmd get_throttled and dmesg can tell you more about the display problem. See Raspberry Pi’s remote access docs for more.
Frequently asked questions
Why does my Raspberry Pi say “no signal” even though the lights are on?
If the green LED flickers during boot, the Pi is running and the HDMI side failed. Usually the display wasn’t detected at power-on, so the HDMI output was never enabled. Power the monitor first, connect directly, and if needed add video=HDMI-A-1:1920x1080M@60D to cmdline.txt.
Does hdmi_force_hotplug still work?
Not on Raspberry Pi OS Bookworm or Trixie. Raspberry Pi documents it as a legacy option that doesn’t work on those releases. Use the video= kernel parameter instead.
What does a solid red light and no green light mean?
The board has power but isn’t reading a bootable card. Reseat the card and reflash it with Raspberry Pi Imager. If that fails, try a different card.
I see the rainbow screen, then nothing. What now?
The rainbow splash comes from the firmware, so the hardware, HDMI cable and card are basically working. A blank screen after that usually means the kernel chose a video mode your display doesn’t accept, or the system stopped during boot. Try the video= setting with a lower resolution, or disable_fw_kms_setup=1.
Can a weak power supply cause no display?
Yes. Undervoltage can make the Pi reset during boot or corrupt the card. If the red LED isn’t steady, fix power before anything else.
Quick checklist
- Monitor on and on the correct input before the Pi powers up
- 5.1 V, 2.5 A supply with a short, decent cable; red LED steady
- Card freshly written with Imager for “Raspberry Pi 3”; green LED flickering
- Direct HDMI connection, known-good cable, no adapters
- video=HDMI-A-1:…D in cmdline.txt on Bookworm or Trixie
- SSH enabled as a backup way in
If you’re still deciding whether a Pi 3 B+ is the right board for your project, our Raspberry Pi 3 Model B+ overview and Raspberry Pi vs Mini PC comparison cover the trade-offs. A mini PC like the Celeron N3350 box uses standard HDMI and BIOS handling, which avoids most of these display quirks.